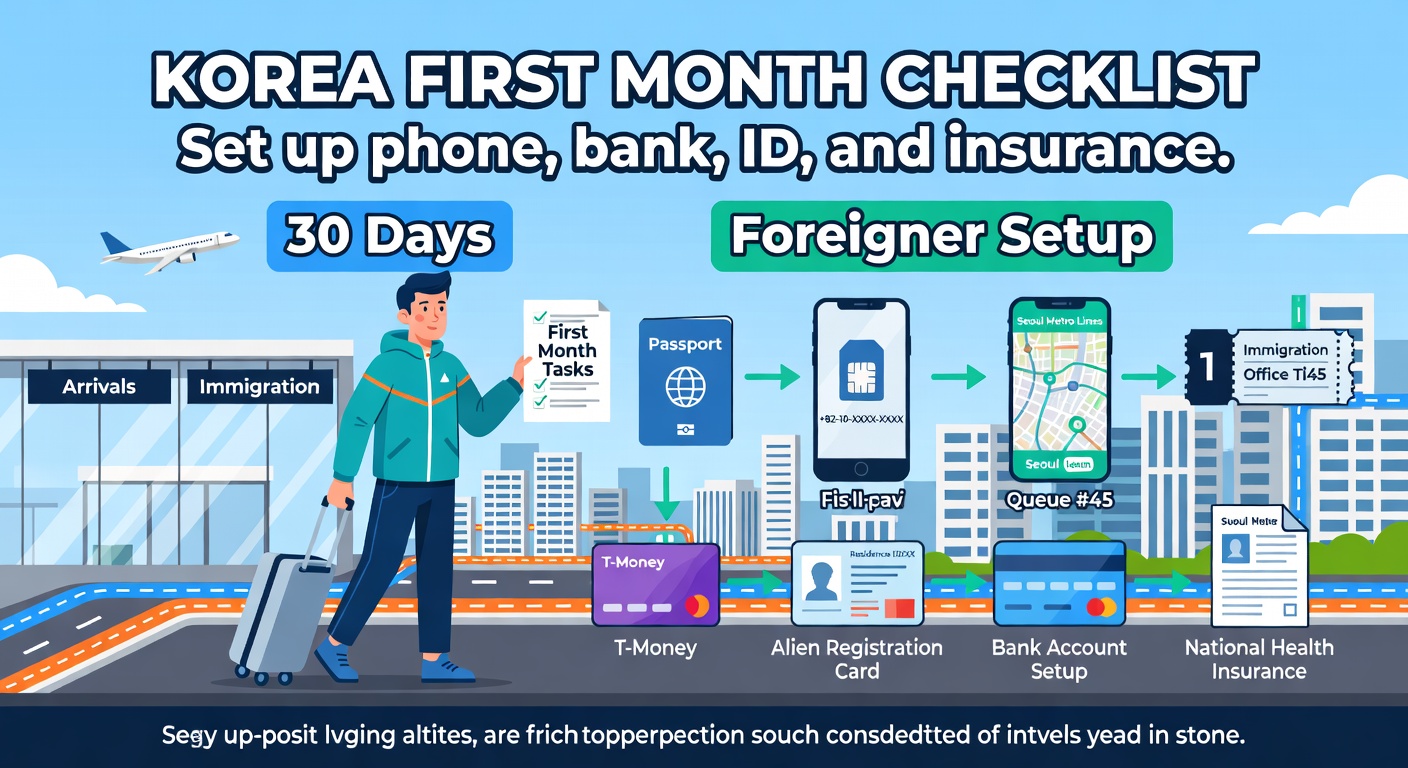
First Month in Korea as a Foreigner — Your Complete Setup Checklist
You just landed at Incheon, your suitcase is heavy, and your phone barely works. Somewhere between jet lag and a vending machine coffee, a question keeps circling: what exactly do I need to get done before this month is over? The list feels endless — registration offices, bank accounts, SIM cards, insurance — and nobody hands you a single checklist at the gate.
This article walks you through the essential tasks week by week, from Day 1 airport errands to the bureaucratic wrap-up by Day 30. Every step here reflects procedures confirmed as of March 2026, covering foreigner registration, mobile plans, banking, transportation, and health insurance so you can stop Googling in a panic and start checking things off.
Week 1: Land, Connect, and Move Around
The first few days are about getting the basics working — a phone number, a way to pay for transit, and a confirmed address. Everything else builds on these three.
Get a prepaid SIM at the airport. Before you even clear customs, you will see counters for KT, SKT, and LG U+ in the arrivals hall. A prepaid SIM requires only your passport and takes about ten minutes. Prices run higher than postpaid plans, but you need a working Korean number immediately — without one, you cannot verify accounts, call your landlord, or use most Korean apps. Many people find this confusing because some counters sell tourist-only data SIMs that do not include a real phone number. Make sure to ask for a SIM with a Korean phone number, not just a data-only plan.
Pick up a T-money card. Available at any convenience store (CU, GS25, 7-Eleven) or from machines at the airport train station, T-money is the transit card that works on every bus, subway, and even some taxis nationwide. Load it with 10,000–20,000 won to start. You tap on when boarding and tap off when exiting — forgetting to tap off means you get charged the maximum fare.
Download three apps right away. KakaoMap or Naver Map for navigation (Google Maps is unreliable for Korean transit directions), and KakaoT for taxis. All three support English, though Naver Map's English mode was expanded significantly in early 2026. These apps will become your daily companions.
Secure your address. Whether it is a dormitory, goshiwon, Airbnb, or a proper lease, you need a confirmed Korean address before you can do almost anything administrative. If you are in temporary housing, that address still counts for your initial foreigner registration appointment.
Book your foreigner registration appointment. Do this on Day 1 or 2 — available slots at immigration offices fill up fast, sometimes weeks out. Go to HiKorea, select your nearest immigration office, and reserve a date. You will not actually visit until Week 2, but booking early prevents a frustrating delay.
🔗 HiKorea — Immigration Appointment System
Once your phone works and you can get around, the next priority is the paperwork that unlocks everything else.
Week 2: Foreigner Registration and Opening a Bank Account
This is the heaviest administrative week. Two big tasks — foreigner registration and banking — and both require patience and documents.
Foreigner Registration (외국인등록)
If you plan to stay longer than 90 days, registering is mandatory — not optional. According to the Ministry of Justice, failing to register on time can result in a fine of up to 1 million won (roughly $750). As of December 2025, walk-in appointments are no longer accepted; you must book through HiKorea in advance.
Bring these to your appointment: passport, visa confirmation, one passport-style photo, your housing contract or a letter from your dormitory, and the application form (available on-site). The specific documents can vary slightly depending on your visa type and which regional office you visit, so double-check with your local immigration office beforehand.
After submitting, you will receive your Alien Registration Card (ARC) by mail within two to three weeks. This card is essentially your Korean ID — you will need it for banking, phone contracts, and government services.
Opening a Bank Account
You can technically open a bank account before receiving your ARC, but the process is smoother with it. Some banks accept a "Certificate of Alien Registration Application" as a temporary substitute. KB Kookmin Bank and Shinhan Bank are the most commonly recommended for foreigners, mainly because they offer English-language interfaces and staff who are accustomed to foreign clients.
One thing almost everyone runs into: your account will have transfer and remittance restrictions for the first one to three months. This is a fraud-prevention measure mandated by Korea's Financial Services Commission, and it applies broadly regardless of which bank you choose. As of February 2026, Shinhan and Hana Bank also require a housing contract or employment certificate in addition to your passport for identity verification — a change from previous years when a passport alone was sufficient.
For sending money home, services like WireBarley, Sentbe, and Revolut tend to offer better exchange rates and lower fees than bank wire transfers. Toss and KakaoPay have also expanded their foreign account registration options since late 2025.
| Bank | English Support | Best For | Note |
|---|---|---|---|
| KB Kookmin | App + Branch | General flexibility, ATM network | Most foreigner-friendly account opening process |
| Shinhan | App + Branch | Global accounts, online banking | Requires housing contract since Feb 2026 |
| Hana | App + Branch | International remittances | Lower fees for overseas transfers |
| Woori | Limited | Locations near universities | Varies by branch |
With your registration filed and a bank account open (even if restricted), you now have the foundation for everything in Weeks 3 and 4.
Week 3: Upgrade Your Phone Plan and Set Up Daily Life
Once your ARC arrives — usually by the middle of your second or third week — a few things that were previously blocked now become available.
Switch to a Postpaid Phone Plan
Your prepaid SIM served its purpose, but postpaid plans are significantly cheaper for the same data and calling minutes. With your ARC in hand, you can walk into any KT, SKT, or LG U+ store and sign up. Budget carriers (called MVNOs or 알뜰폰 in Korean) offer even lower prices, though availability for foreigners varies and some MVNOs have been inconsistent about accepting foreign registrations.
One thing that trips people up: if you sign a contract plan (약정), leaving Korea before the contract ends means paying an early termination fee. If your stay is uncertain, ask for a no-contract option even if it costs slightly more per month.
Install the Apps That Actually Matter
Beyond maps and taxis, Week 3 is when you should set up the apps that define daily convenience in Korea. Baemin (배달의민족) for food delivery, Coupang for next-day online shopping, and the PASS app for identity verification. PASS replaces the old certificate-based authentication system and is essential for online banking, government portals, and signing up for most Korean services.
Setting up PASS requires your ARC number and a Korean phone number. If your physical card hasn't arrived yet, some carriers will accept your registration receipt to get you started — worth asking at the counter.
Set Up a Transit Pass
If you commute to work or school on the same route daily, a monthly transit pass (정기권) through the T-money or Kakao T app can save you a meaningful amount. Prices vary by city and route, but in Seoul, the climate card and regular monthly pass offer a set number of rides for a flat fee — check current pricing and limits in the T-money or Kakao T app before committing. Student discounts require a valid Korean student ID.
With your phone, bank, and daily apps sorted, the last week is about tying up the administrative loose ends.
Week 4: Insurance, Taxes, and Final Paperwork
By now, you should feel noticeably more settled. The final week is about confirming the systems that run in the background — health insurance and local tax obligations.
National Health Insurance (국민건강보험)
If you hold a visa that keeps you in Korea for six months or more, you are automatically enrolled in Korea's National Health Insurance (NHI). According to the National Health Insurance Service (NHIS), the enrollment triggers based on your entry date, though the exact timing has been a source of confusion — multiple reports indicate that the automatic enrollment date does not always match the date you would expect based on your arrival. It is worth contacting NHIS directly to confirm your status.
For employed foreigners, your employer typically handles the enrollment and splits the premium. For students and others, you will be classified as a "regional subscriber" and pay the full premium yourself — currently around 130,000–150,000 won per month, though this varies. Coverage typically reduces out-of-pocket costs at hospitals and clinics substantially — commonly cited around 60–70%, though actual amounts vary by treatment type and provider.
🔗 National Health Insurance Service (NHIS)
People on short-term visas (C-series, under 90 days) are not automatically enrolled, which means you should carry private travel insurance until your status changes.
Local Taxes
Foreign residents may be subject to local resident tax (주민세), which is a modest annual charge — usually around 10,000 won or so for individuals. This is automatically assessed and not something you need to actively file, but it sometimes causes mild alarm when the bill appears unexpectedly. Your district office (구청) handles this.
Double-Check Your Registration Details
Before the month ends, verify that the address on your ARC matches your actual residence. If you moved from temporary housing to a permanent place, the 14-day reporting window is strict. You can update your address at the local immigration office or through HiKorea online.
Things That Catch Almost Everyone Off Guard
Even with a checklist, a few aspects of settling in Korea consistently surprise newcomers. These are worth knowing before they happen.
Internet banking verification is not what you expect. If you are used to logging into your bank with a password and maybe two-factor authentication, Korean online banking adds extra layers. The old system relied on digital certificates installed on your computer. That has largely been replaced by PASS and FIDO biometric authentication, but the setup process is still more involved than what most foreigners are used to. Budget a solid 30 minutes to configure your banking app properly.
Your bank account is not fully functional on Day 1. As mentioned, transfer and overseas remittance functions are restricted for the first one to three months. This means you cannot easily send money back home right away through your Korean bank. Plan accordingly — keep enough in your home country account to cover obligations there during this period.
Not everything works the same outside Seoul. Immigration office document requirements, bank branch policies, and even MVNO availability can differ between Seoul, Busan, Daegu, and smaller cities. If you are settling outside the capital, confirm specific requirements with your local office rather than relying entirely on guides written with Seoul in mind.
Contract cancellation fees are real. Phone plans, gym memberships, internet service — Korea's subscription culture often includes lock-in periods. Breaking these early means paying penalties. Read the terms carefully, especially if your visa duration is uncertain.
🔗 Seoul Global Center — Foreigner Living Guide
Key Deadlines and Numbers at a Glance
| Task | Deadline | Where | What You Need |
|---|---|---|---|
| Foreigner Registration | Within 90 days of entry | Immigration office (book via HiKorea) | Passport, visa, photo, housing contract |
| Address Change Report | Within 14 days of moving | Immigration office or HiKorea online | ARC, new housing contract |
| Health Insurance Enrollment | Automatic after 6 months of stay | NHIS (employer handles for workers) | ARC number |
| Bank Account Opening | No deadline, but sooner is better | Any major bank branch | Passport + ARC (or application receipt) |
| Postpaid Phone Plan | After receiving ARC | Carrier store (KT, SKT, LG U+) | ARC + Korean bank account |
Wrapping Up Your First 30 Days
The first month in Korea is front-loaded with paperwork, but there is a clear order that makes it manageable: connectivity first (SIM + transit card), registration second (immigration + bank), daily life third (apps + phone plan), and insurance last (health coverage + address confirmation). Trying to do it out of order — like opening a bank account before you have an address, or switching phone plans before your ARC arrives — only creates frustration.
By Day 30, you should have a working Korean phone number on a proper plan, a bank account (with patience for the transfer restrictions to lift), your ARC in your wallet, and health insurance confirmed or on its way. From there, Korea starts feeling less like a bureaucratic maze and more like a place you actually live.
Frequently Asked Questions
Q. Can I open a Korean bank account without an Alien Registration Card?
Some banks allow you to open an account with a receipt showing you have applied for foreigner registration, but the account will have significant restrictions. KB Kookmin Bank is generally considered the most flexible for this. Expect transfer limits for at least the first one to three months regardless of when you open the account.
Q. How much does Korean health insurance cost for foreigners?
If you are employed, your employer covers roughly half the premium. For regional subscribers (students, freelancers, dependents), the monthly cost is typically around 130,000 to 150,000 won as of 2026, though the exact amount depends on your income assessment. Coverage begins automatically after six months of continuous residence for most long-term visa holders.
Q. What happens if I miss the 90-day foreigner registration deadline?
The Ministry of Justice can impose a fine of up to 1,000,000 won for late registration. In some cases, it may also affect future visa renewals or extensions. Immigration offices no longer accept walk-ins as of December 2025, so book your appointment on HiKorea as early as possible to avoid scheduling delays pushing you past the deadline.
Q. Should I get a prepaid or postpaid SIM card in Korea?
Start with a prepaid SIM at the airport since it only requires your passport and gives you immediate connectivity. Once you receive your Alien Registration Card (usually 2–3 weeks after your immigration appointment), switch to a postpaid plan for better rates and more data. Avoid signing long-term contracts if your stay duration is uncertain, as early termination fees apply.
Q. Which apps do I absolutely need for daily life in Korea?
KakaoMap or Naver Map for navigation (Google Maps is unreliable for Korean transit), KakaoT for taxis, Baemin for food delivery, and the PASS app for identity verification on banking and government sites. Coupang is also essential for affordable next-day delivery shopping. All of these support English to varying degrees.
Recommended Posts
IT Engineer · Content Creator
Practical guides based on official sources — simple and actionable.
View all posts →